

Thrips are tiny, narrow insects that puncture plant tissue and draw out cell contents, leaving irregular silvery scars, distorted new growth, damaged flowers, and sometimes small dark drops of waste. Because thrips hide in buds, folds, and leaf undersides, you may see their damage before you see an insect. Isolate the plant, confirm what you find, remove badly affected material, and choose a treatment labeled for thrips on indoor plants.
A pale mark on one leaf is not enough to diagnose thrips. Mites, physical rubbing, edema, sun damage, and other problems can also leave spots or scars. The pattern and the presence of the pest matter.
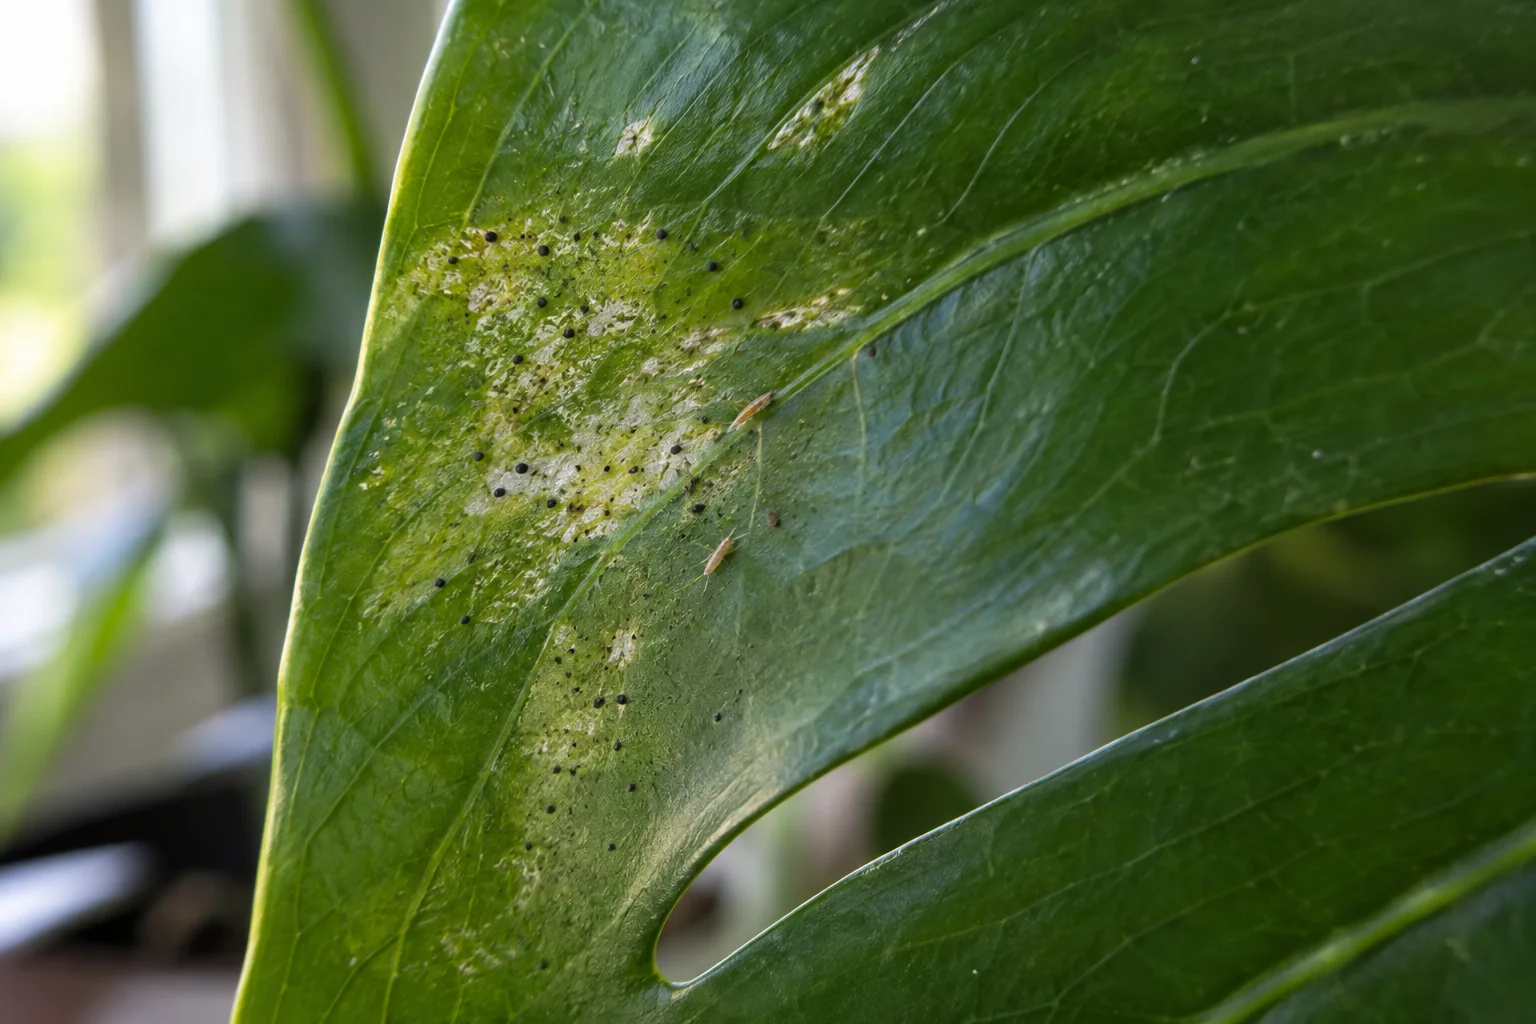
What thrips look like
Adult thrips are usually about 1/16 inch long, although size and color vary by species and life stage. Their bodies are slender rather than round. Winged adults have narrow, fringed wings, but those details are difficult to see without magnification. Immature thrips are wingless and may be pale yellow or tan.
Try these checks:
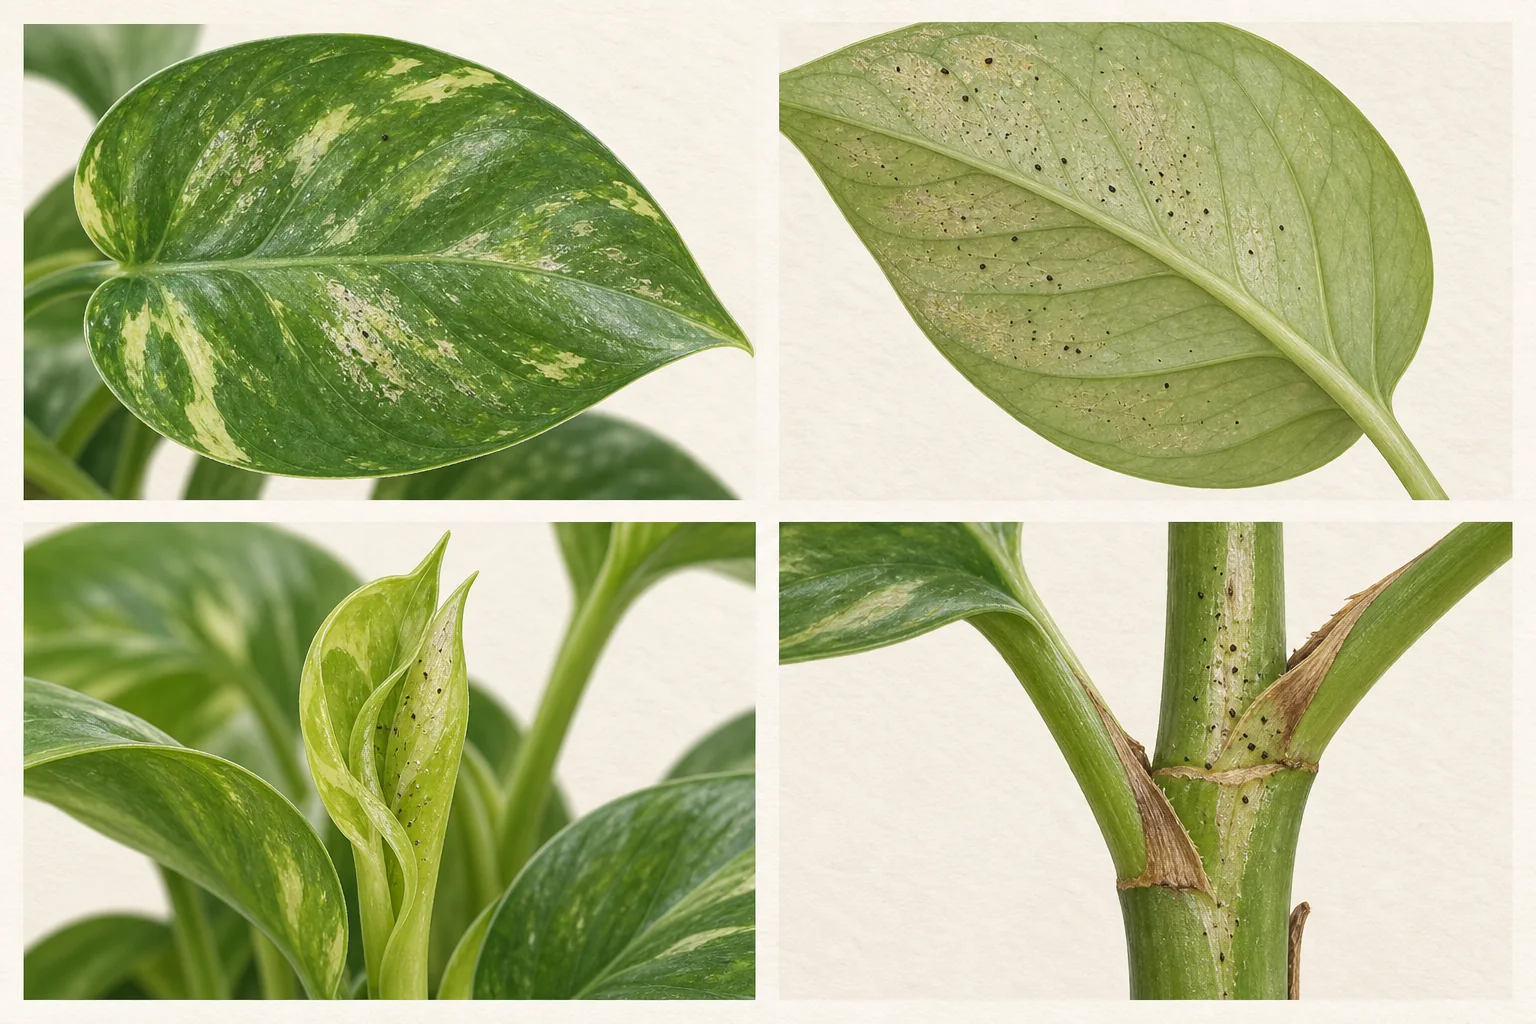
- Inspect the underside of leaves, new growth, flowers, and tight spaces where leaves meet stems.
- Hold a sheet of white paper under the plant and tap or gently shake the foliage. Tiny narrow insects may run across the paper.
- Use a phone macro lens or magnifier to photograph anything that moves.
- Look for irregular silvery or gray scars and tiny dark specks near the damage.
If you need a hand lens, the Carson TriView TV-15 on Amazon (paid link) offers 5x, 10x and 15x magnification using different lens combinations. Use a magnifier you already own if it gives a clear view. Magnification helps you inspect details; it does not confirm the pest’s identity by itself.
Sticky cards can help monitor flying adults, but a trap should support an inspection rather than replace it. See UC IPM’s thrips identification and monitoring guidance.
Thrips damage compared with other problems
| What you see | Thrips becomes more likely when | Also check for |
|---|---|---|
| Silvery, irregular streaks or patches | Narrow insects or black specks are near the scars | Physical rubbing, old mechanical damage |
| Distorted or scarred new leaves | Thrips are hiding in folds or at the growing point | Physical damage, aphids or other pests |
| Streaked or misshapen flowers | Insects are inside flowers or buds | Botrytis, handling damage, normal aging |
| Fine pale stippling | No webbing is present and narrow insects can be found | Spider mites, especially if fine webbing is visible |
| Yellowing and leaf drop | Feeding signs are present on several leaves | Wet roots, dry soil, abrupt light or temperature change |
No single row is a diagnosis. Use the whole pattern and find the pest whenever possible.
What to do when you find thrips
1. Isolate the plant
Move it away from the collection without brushing it through other plants. Wash your hands after handling it, and clean tools before using them elsewhere. For plants returning from outdoors, follow our indoor-move inspection and care checklist.
2. Remove the worst hiding places
Dispose of spent flowers and heavily infested material when the plant can tolerate the loss. Seal the material before carrying it through the house. Pruning every leaf is not a substitute for treatment if thrips remain in protected growth.
3. Rinse a sturdy plant
University of Minnesota Extension’s indoor-pest guidance includes washing foliage as part of control. Support the plant, direct water to leaf undersides and stems, and avoid washing infested material into another plant’s pot. This can reduce the population, but it rarely reaches every hidden insect or egg.
4. Choose a labeled treatment
Insecticidal soap, horticultural oils, and other active ingredients may be options, depending on the plant, pest, location, and product label. Thrips can be difficult to control because they hide and because contact products only work where the spray reaches.
Confirm that the label includes:
- thrips;
- your plant or an appropriate ornamental category;
- indoor use, if the plant will be treated inside;
- mixing and coverage directions;
- the interval for repeat applications;
- precautions for people, pets, surfaces, heat, sunlight, and plant sensitivity.
Do not combine products or add dish detergent. Test any treatment as directed before applying it to the whole plant. Colorado State explains why household detergent is not a substitute for insecticidal soap.
5. Repeat the inspection
One application should not be treated as proof that the infestation is finished. Thrips have multiple life stages, and protected individuals may escape a contact treatment. Follow the product’s interval and keep checking new growth, leaf undersides, flowers, and traps.
When the damage keeps appearing
Old scars will not turn green again. Judge the plan by fresh growth, pest counts, and new damage rather than by the appearance of leaves that were already injured.
If new scars continue:
- make sure the insect was correctly identified;
- check nearby plants and cut flowers;
- inspect unopened leaves and buds;
- confirm that the application covered the pest’s hiding places;
- review whether the product label calls for repeat treatment;
- consider whether keeping a badly infested, replaceable plant is worth the risk to the collection.
An extension office or diagnostic lab can help when the pest cannot be identified from a photograph.
What I would not do
I would not diagnose thrips from a single brown patch, spray every plant preventively, or rotate through homemade mixtures. Unnecessary treatments can injure foliage and make the original damage harder to interpret.
Use university or extension photographs when you need to identify the insect itself. Close-up images in this guide show where to inspect and which combinations of plant damage and pest signs deserve a closer look.